

Supportive, Professional, Client-Focused Service
Get in touch with Lecreator Company
From prototypes to full-scale production, we’ve got you covered.


CNC machining of acrylic provides a plethora of opportunities concerning the most precise high-quality products. One of the common problems faced by manufacturers and hobbyists is the cracking that occurs during machining. Cracks not only ruin the chances of obtaining a beautiful final product but also waste materials and are costly to fix. This blog post presented here speaks on binding together the measures essential to employ while working with acrylic CNC so that your project could be back in motion with very little PC. This piece will make further sense in both instructions, being you a professional in this field-long ago or just starting.
One transparent thermoplastic recognized also with a familiar name, Polymethylmethacrylate (PMMA), an acrylic is widely employed in multiple isolated scenarios owing to attributes like lightness, toughness, and optical clarity. Offered under various proprietary brands such as Plexiglas and Lucite, it stands up as a shatterproof alternative to glass. The acrylic finds widespread application owing to big versatility in use under extreme weather conditions, applied indoors or outdoors. The substrate may be molded, cast, or extruded in different shapes and sizes, thereby further augmenting the usefulness of acrylic in products like aquariums, skylights, display cases, and some medical implements. Pleasant handling is safer to ensure when cutting or working with an acrylic piece, because should anything go wrong, such as working on it with a bent hand on a hot machine, the possibility, for good or worse, remains relatively high that the acrylic might warp or crack.
| Application | Why Acrylic? |
|---|---|
| Aquariums | Transparency and strength give acrylic the edge in constructing large and durable aquariums. |
| Skylights | Acrylic’s light transmission qualities and weather resistance make it a market favorite for this purpose. |
| Display Cases | In showcasing merchandise and display items, acrylic surface options for their clarity and scratch-resistance features. |
| Signage | Acrylic’s weightlessness and ease of custom designing become the factors for making highly visible indoor and outdoor signage. |
| Medical Devices | Used for several medical applications such as incubators and surgical tools; it is biocompatible and easily sterilizable. |
Therefore, the characteristics of plastics are examples of contributing reasons for the cracks under some circumstances, although the plastic products are generally impact and shrinkage tough. The principal reason is the brittleness of plastics; though hard, they can become prone to cracking under load or impact. Hence, mishandling or unfair processing seems to have the same effect. In addition, optical decay occurs when the material is long-term exposed to UV radiation, causing minute curved cracks to appear on its surface; and with the onset of any temperature changes, expansion and contraction can lead to the generation of various stress cracks in acrylic composite materials, particularly those that are negatively mounted. And a poor machining activity may also cause accommodation to open from uneven tension load. Various post-mold manufacturing procedures involved in the stabilization of the plastic via annealing have been applied to simplify joint-cracking problems.

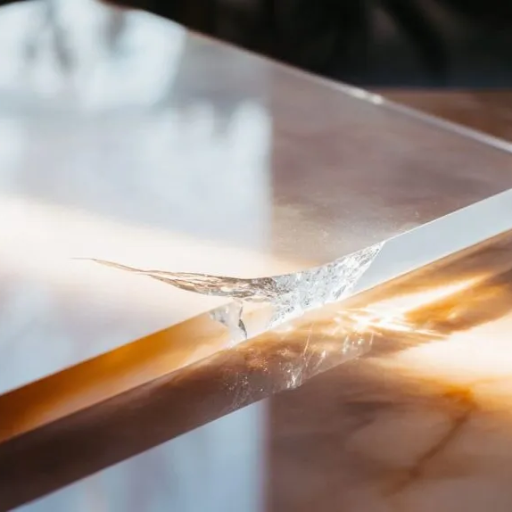
The most common type of crack observed and experienced with acrylics is the surface crack. These are mainly thin fractures formed on the exterior part of a material. They are stress-cheating at any sharp points, edges, areas, and contacts when subjected to stress. Several people before might have tried typing “how to fix surface cracks in acrylic” or “preventing acrylic cracking,” which came up as keywords making many think the subject was twisted. The secret to prevent surface cracks in acrylics begins by proper handling of the material using protective coatings whereas the voids should help to distribute stress equally in an appropriate manner at the time of assembly. The application of acrylic-formulated glues and polishing techniques to restore the integrity and appearance of attack caused by such fractures could be construed as treatment for surface cracks. Besides, in the fight against the containment of acrylic’s surface degradation by the resistance of the UV spectrum over time, the trend will continue.
Acrylic structural fractures are generally caused by excessive stresses, devoid of proper installation, or through a material being overexposed to environmental conditions like rapid temperature fluctuations and relentless UV radiation. The fractures can manipulate the form and structural integrity of any material in an unpleasant manner if left unaddressed. Structural concrete repairs aimed at efficient crack repair generally would involve specialty techniques such as solvent bonding or fusing material together with a two-part adhesive. Slightly larger cracks can sometimes expect reinforcement of the area with more acrylic material to keep them serviceable. Preventive measures are the most significant feature to be considered, for example, stress-relief techniques during acrylic manufacture and UV-protective coatings, enhancing the growth of structural cracks in the future. A well-thought-out design and careful placement of acrylic material, additionally, can greatly advance its service life in various applications.
Typically, hairline cracks on acrylic are due to high stress, environmental exposure, or something related to mistreatment when it was installed. These little fractures can almost look like thin, spiderweb-like lines that exist on the surface of the acrylic itself. In order to treat the issue, the first priority should be to recognize and eliminate the cause of stress, whether it be thermal stress, chemical exposure, or joint positioning. Depending on the severity and location, hairline cracks are often mended by filling them with specialized types of acrylic adhesive to stop their growth.
Customers often ask to find a solution for hairline cracks. Experts suggest selecting an acrylic layer that is made especially to not cracked and/or using a protector film or structure to protect the material from harmful UV light and any wear and tear along with the environment. In addition, care should be taken not to put much stress (from-related force or otherwise) on the acrylic to prevent undue stress and damage.
| Cause Category | Key Factors | Risk Level |
|---|---|---|
| Environmental Factors | UV radiation, temperature fluctuations, high humidity | HIGH |
| Improper Handling | Scratches, stress points, uneven load distribution | MEDIUM |
| Poor Installation | Excess force, inadequate drilling, no expansion room | HIGH |
| Material Quality | Internal stress, inconsistent polymerization, impurities | VARIABLE |
Extreme conditions of the environment could bring to acrylic materials cracking. Continuous exposure to UV radiation degrades the polymer chains causing them to become brittle with time thereby establishing cracks. Added to this, sudden fluctuations in temperature can lead to stress due to thermal expansion and contraction. High humidity can also contribute because excessive moisture enables molecular degradation in some acrylic formulations. So to counter the effects preventive measures are a must, such as protective coatings, UV blockers, or ensuring a stable environment.
A common cause of acrylic cracking is mishandling during transportation or storage. Moving sheets without care can easily scratch them or induce stress points or other minor blemishes, all of which make the acrylic more prone to cracking when subjected to loads or environmental damage. The material must be treated with care; thus, one should use coverings to protect the material from getting scratched by rough handling.
With many unsatisfactory circumstances on their own, improper installation brings about cracking as a result of misinterpretation of a couple of other conditions. Such improper installation could come owing to excess force exerted on the joint, inadequate understanding of proper drilling techniques, or a failure to provide adequate room outside the joint for expansion. For instance, by using inappropriate tools or not applying the force evenly in a joint, one would create stress-concentration areas. A design that allows for space in mounting for thermal expansion of the material significantly reduces the stresses on the material and consequently ensures its durability.
Moreover, even distribution of weight so as to prevent any single spot from bearing the brunt of a greater load, and not over-tightening screws to create such excess tension that it shortens the life of the acrylic work-surface while is critical maintenance techniques. A careful reading of the manufacturer’s guidelines concerning thickness, edge-finishing, and installation methods should be undertaken, which can save the purpose by leading to a deficit in the long-run.
Quality acrylic material is vital in minimizing the chance of cracking while taking time. The acrylic of bad quality or the one not properly made is expected to have internal stress. Such stress, over time, ends up as breaks. Factors such as inconsistent polymerization during manufacturing, impurity presence, or thickness of material that is not uniform, among others, can harm the durability of the acrylic. Further, there are environmental influences like UV exposure or extensive temperature fluctuations, which would weaken the acrylic perhaps more if it has not been well-treated or strengthened. Selecting high-quality acrylic that has been processed really well and devised accordingly for the intended application significantly reduces the cracking risk and those gaping at the long term of performance.

Properly preparing and improving the acrylic pours reveals better yields to avoid drying shortcomings while employing various cracks and flaws. While deteriorating Byzantine style, it is very essential to acquire the right blend of one’s paint vis-a-vis pouring fees. In this way, the essence of fluidity of the mix exists, presenting a vigilant surveillance on paint cracking. Do remember to stop, therefore, from utilizing thick layers, as thick layers usually do tend to dry unevenly and crack.
Proper conditioning of the surface consists of the second necessary coat. Be sure that the surface is clean, dry, and working surfaces for an acrylic pour, such as a canvas or a wood panel. If a primer or gesso application is done, it will further facilitate paint adhesion and give those colors another chance at life. Equal and important importance should be laid on maintaining a stable atmosphere with a preferred constant temperature and constant humidity, for one certainly should avoid allowing sudden changes here lest drying will go haywire and subsequently end up in all sorts of imperfections.
The key to this is patience in drying; one allows it to dry naturally in a dust-free environment without direct heat or sunlight. Hurrying through the drying stage by exposing the artwork to hairdryers or a heat source can lead to shrinking, separating, or cracking; these issues must be solved by these best practices if one shall enjoy the development of a fine finale-i.e. acrylic pour style paintings that could truly stay unique and resist being assigned to oblivion.
Step-by-Step Checklist
Establishing your artwork with a good acrylic paint helps you limit those chances of cracking. High-quality acrylic paints offer a fine mix of pigments, binders, and chemicals, guaranteeing to provide even better flexibility and durability. If you want to buy your acrylics, professional-grade or artist-grade ranges tend to have well-elevated pigment ratios and higher binding agents compared to student-grade levels. Consider their viscosity; while the more gently moving soft-bodied acrylic or flow acrylic often goes well with the techniques of fluid art, they lower the fear of cracking while drying.
Pouring mediums, an additive, also needs a special mention. Their primary function is to assist the paint polymer in retaining its drying elasticity sans a brittle finis resulting in cracking. Layering cannot be overemphasised; always let each coat to dry out perfectly before another is applied. Quality paint and good additives plus the right layering will guarantee that the acrylic design prevails in its silky, unblemished perfection over time.
| Paint Grade | Advantages | Disadvantages |
|---|---|---|
| Professional / Artist Grade | High pigment ratio, superior binding agents, maximum crack resistance | Higher cost |
| Student Grade | Budget-friendly, widely available | Lower pigment concentration, weaker binders, more prone to cracking |
Environment has a really enormous role in the curing process of acrylic paints, and hence the management of these conditions is mandatory for good paint curing. You must mind the temperature and humidity. Ideally, the room temperature will stay steadily between 60°F and 75°F (15°C and 24°C). A quick drying-out process — which could contribute to parts of this paint showing shrinkage and cracking — is a discouragement. Keeping the relative humidity between 40% and 60% should be useful because serious humidity deviations can eventually contribute to catastrophic results; pouring high humidity can slow drying and take you on surface irregularities, while low humidity units dry paint too quickly-literally bound to produce a crack.
The use of a hygrometer and thermometer are two really helpful tools to maintain the humidity while temperature changes are regulated. The application of either a humidifier or a dehumidifier is the most effective in maintaining preferred moisture levels. It is suggested that painting during the time of day when the air is naturally in the desired state is optimal. It is also not recommended to place the artwork in front of direct sunlight, near heating ducts, or air conditioners because their heat might ignore local heat zones, which might later become the cause of clumping during the curing process.
Research Finding
Recent data points out that when used in a controlled environment, acrylic paints performed the best. Research suggests that flawing away in cure from uneven drying increases the chances of cracking by up to 30%, thus stressing outside factors. By monitoring and maintaining a good curing environment, artists stand to increase the lives of their acrylic creations.
| Parameter | Ideal Range | Effect of Deviation |
|---|---|---|
| Temperature | 60°F – 75°F (15°C – 24°C) | Too hot = fast shrinkage & cracking; too cold = inadequate curing |
| Relative Humidity | 40% – 60% | High humidity = surface irregularities; low humidity = rapid cracking |

Keep your surface clean and make certain you maintain the finish on your acrylic piece for a long life. Acrylic paintings need to be observed and preserved with routine maintenance or observation. Begin by cleaning the surfaces with a dry, new cloth, no matter how nubby or lint-free, since water or any cleaning solution can be damaging to the surface, causing side effects or affecting the layers of paint.
You must frequently monitor any problems on your canvases, such as cracking, discoloration, or paint peeling. Act now as soon as any visual hints show to help avoid continuous damage. Therefore, avoid touching the acrylic piece in any way and keep it within a room of stable temperature with a moderate humidity. High temperatures or extremely low temperatures can allow the colors to fade faster. Like, direct sunlight should be prevented at all costs, and very intense flashes should also be avoided.
Acrylic artwork requires adequate support at all times, to prevent any kind of bending or material exhaustion. Always consider protective covering to be essential so that the item is shielded against dust, scratches, and impact during transfer. You can protect and look after your acrylic art with caution and detail to make sure that it is extraordinary and impeccably maintained for many years to come.
Maintenance Checklist
The returns on acrylic paints are maximized by preventing the material itself from being exposed to harsh substances, especially those that would cause more abrasion and visible effects. Damage, seen as scratches, occurs with less protection of the acrylic, thus making the surface opaque to some extent. Never use strong, abrasive cleaning agents on acrylic, which are very likely to scratch the surface and could even ruin it. So instead, use something mild that won’t similarly damage the material such as a good microfiber cloth and plain dish soap diluted in warm water. Rub gently and softly against the microfiber cloth’s surface, after which one should speedily dry away all wetness. A new, clean microfiber cloth will prevent streaks.
Even according to recent evidence, there are some forms of cleaners made specifically for acrylic that would be gentle in dealing with fingerprints and other such smudges, yet other cleaners are just not suitable with solvents like ammonia (such as what you would find in an ammonia-based glass cleaner). You must see to it that there are no other debris and dust in the wake of cleaning that might scratch its surface. The transparency and life of acrylic material will be later prolonged when these methods are enabled frequently so that the material exists in perfect condition for Decades to come.
| ✓ DO | ✗ DO NOT |
|---|---|
| Use a microfiber cloth | Use abrasive cleaning agents |
| Use mild dish soap diluted in warm water | Use ammonia-based glass cleaners |
| Use acrylic-specific cleaning products | Leave debris and dust on the surface |
| Dry immediately with a clean microfiber cloth | Allow wetness to sit on the acrylic surface |
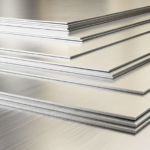
Appropriate storage is a must for keeping acrylic surfaces intact for a longer period of time and to prevent them from cracking. Acrylic must be stored in a dry and cool environment that is far away from direct sun rays and extreme temperatures, as heat, and UV rays can degrade the structure. Also, the humidity within the storage area must be less. This is because moisture may initiate the irreparable deterioration of the acrylic surfaces. When stacking acrylic objects on top of each other, always place fiber-filled materials between layers, such as felt or foam, to avoid scratches and stress marks. Vertical storage of acrylic items is better whenever possible and goes a long way in protecting them. This also distributes the weight evenly, and hence, fewer pressure points are formed. Maintained correctly, acrylic surfaces will last for many years while still looking brand new.
Storage Best Practices
Reference Sources
Adjustment of Mill CNC Parameters to Optimize Cutting Operation and Surface Quality on Acrylic Sheet Machining
This study explores the optimization of CNC milling parameters to prevent cracking in acrylic sheets, focusing on feed rate and cutting tool hardness.
Link to source2
Taguchi’s Method for Optimum Cutting of Acrylic Materials on a 40-Watt CNC Laser Cutting Machine
This paper discusses the influence of cutting speed, lens focal length, and other parameters on preventing cracking during CNC laser cutting of acrylic materials.
Link to source3
Cellulose Nano Crystals (CNC) as Additive for a Bio-Based Waterborne Acrylic Wood Coating
While focused on coatings, this study highlights the role of additives like CNC in improving the mechanical properties of acrylic materials, indirectly contributing to crack prevention.
Link to source1
How do consistency and mixing affect acrylic paint crack resistance?
Cracking is avoided due to proper paint consistency mainly because of the wetness or greasiness of paint that looked like too much water or thinner (so they weaken the film interior by allowing shrinkage) that occurs as water and solvents evaporate, or too-thick paint that forms a dry film. The layer on top dries faster than the layers it is covering and cracks as a result; instead of being overly thin, consistency should lie within the medium range-marking an obviously wrong direction; paint should be creamy and nongreasy, much alike its former self, but easier to work with, to allow for good adhesion between layers without leaving large puddles when diluted. Run is meant to flow a little easy; reluctance to run sets in prime time; moisture turns this paint streaky fast, forming small cracks all over it.
Could a spray bottle or water dilution stop acrylic paint from cracking?
A very fine spray, occasionally administered with a water spray bottle, can slow the drying process from the surface while you are still working on a piece, but too much water either through paint or another medium used to “thinner” it, or continuous spraying, will cause weak paint films and lack of adhesion. Dilute wisely; use retarding and flow-improving mediums such as acrylic mediums, blending mediums, etc. to manage drying, control a bit more by mister on the gessoed surfaces first and do not attempt so often that the canvas is saturated. Water can get in the way, causing adhesion troubles, and enhance the possibility for cracking.
How does one address the issue of cracking due to heavy, fluid layers of acrylic paint pouring and applying the top coat?
Cracking is a significant risk while using acrylic paint pouring techniques due to the localized presence of heavy, fluid layers, so to avoid cracks, a good pouring recipe must be used that would prevent excessive paint build-up, provide the necessary flexibility on pouring and extend the resting period between stages. Be sure to cure the under layers before applying the top coat. The final finish or the flexible top coat should be water-based acrylics compatible and applied thinly so as not to trap moist air, which eventually cracks later.
How can I optimize CNC machine settings to keep cracks at bay?
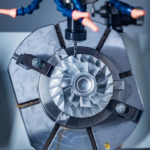
Optimizing CNC machine settings is very important for keeping acrylic from cracking. Starting with lower spindle speeds and feed rates, high speeds generate excessive heat, which generates internal stress likely to create stress risers and crack. Use carbide tools, which are sharp and of high quality, and especially designed for plastics, for smoother cuts and lesser intrinsic fractures. Set up a coolant system or utilize air blast with a suitable tube to help further cool the machined surface so it can remain at an even temperature for that elongated period of production. Whenever it is possible, use climb milling instead of conventional milling to decrease the pressure on the tool and less possibility of stress on the acrylic. Through these carefully adjusted variables, you may achieve a clean appearance in the edge finishes and those typical defects prevailing in CNC can be escaped.
In what manner do environmental factors tend to affect the longevity of acrylics?
Typically, environmental factors, such as ultraviolet (UV) radiation, temperature changes, and fluctuation in humidity, greatly affect the lifetimes of Bakelite. Extended exposure to sunlight can degrade polymer chains and damage the material causing yellowing or microcracking. This gives rise to heat stress and ultimately accelerates the development of faults and chippings on the sides under extreme temperature conditions. To circumvent these issues, select UV-stabilized acrylic grades, keep items clear of direct sunlight, and maintain consistent environment control in storage areas. The use of anti-static coatings will be beneficial in repelling dust prevention of surface blemishes and gradual material degradation. All those things taken into consideration will help retain the acrylic’s performance and aesthetics.
How do we prevent edge chipping during machining of acrylic?
Edge chipping has to be prevented during acrylic machining by applying cutting tools that are built specifically for plastics, e.g., upcut spiral bits or single flute cutters. The feed must be adjusted to prevent a buildup of heat (friction and melting) and produce weak, breakable cut ends. By adding sacrificial backing material below the acrylic sheet, the workpiece is stabilized and vibrations that result in deflection and cracking avoided. Using masking tapes on the cutting lines is a simple method to lessen chipping and to achieve a clearer, better finish. Finally, stay clear of sudden changes in the cutting directions-or sharp, shock-inducing events-on account of machine vibrations. Following these guidelines, one can produce perfect, clean edges in acrylic work.